Quick Links
Part 1: Building the VCF on VxRail management cluster
Part 2: Virtual Infrastructure Workload Domain creation
Part 3: Deploy, Configure and Test VMware HCX
Part 4: Expanding Workload Domains
I’ve got Cloud Foundation up and running and a VI workload domain created, so I’m ready to think about getting some VMs migrated. This is where VMware HCX comes in. The subject of moving VMs around is a sometimes contentious one. You could talk to ten different people and get ten entirely unique but no less valid methods of migrating VMs from one vCenter to another, across separate SSO domains. But I’m working with HCX because that was part of the scenario.
That doesn’t mean I don’t like HCX, quite the opposite. It takes a small amount of effort to get it running, but once it is running it’s a wonderful thing. It takes a lot of the headache out of getting your VMs running where you want them to be running. It’s a no-brainer for what appears to be its primary use case, moving VMs around in a hybrid cloud environment.
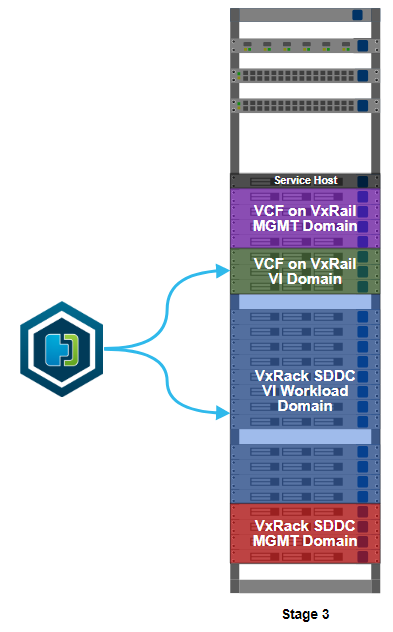
This is stage 3 of the build, HCX installation. I’ve worked out what VMs I can migrate to allow me to free up some more resources on the VxRack. Moving some VMs off the VxRack will allow me to decommission and convert more nodes, then add more capacity to my VCF on VxRail environment. In something of a departure from the deployment norm, the installation starts on the migration destination, not the source.
There is something I need to cover up front, lest it cause mass hysteria and confusion when I casually refer to it further down in this post. ‘Source’ and ‘destination’ are somewhat interchangeable concepts here. Usually, you’d move something from a source to a destination. With HCX, you also have the option of reverse migration. You can move from a destination to a source. Using HCX as a one-time migration tool from VxRack SDDC to VCF on VxRail, it doesn’t matter too much which clusters are my source or destination. If I intended to use HCX with other clusters in the future, or with a service like VMware Cloud on AWS, I’d probably put my source on a VxRail cluster and my first destination on VxRack SDDC. Also important here is that one source appliance can link to several destinations.
Back to the install. The HCX installer OVA is deployed on the VxRail VI workload domain that I created in the last part. The deployment is like any other. I set my management network port group and give the wizard some IP and DNS details for the appliance. The host name of the appliance is already in DNS. After the deployment the VM is powered on, then left it for about 5 minutes to allow all services to start up. As you might expect, attempting to load the UI before everything has properly started up will result in an error. When it’s ready to go, I’ll open up https://[DESTINATION-FQDN]:9443 in my browser and login at the HCX Manager login prompt.
The initial config wizard will is displayed, and it’s quite a painless process. It’s notable though that internet access is needed to configure the HCX appliance. Proxy server support is available. I enter my NSX enterprise plus license key, leaving the HCX server URL at it’s default value.
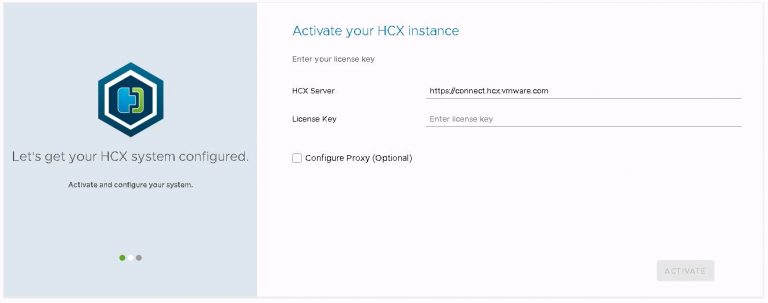
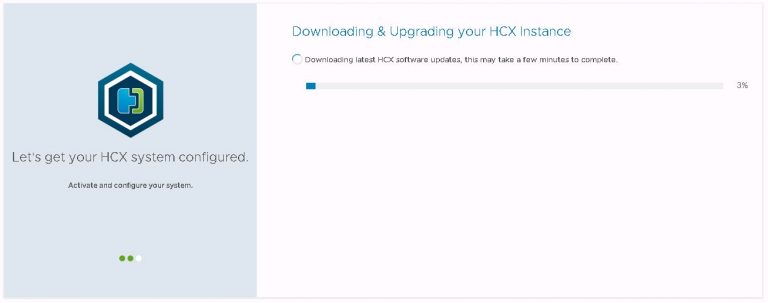
Click the activate button and as I didn’t deploy the latest and greatest HCX build, a download & upgrade process begins. This takes several minutes, the appliance reboots at the end to activate the update. Your mileage will no doubt vary, depending on the speed of the internet connection you’re working on.
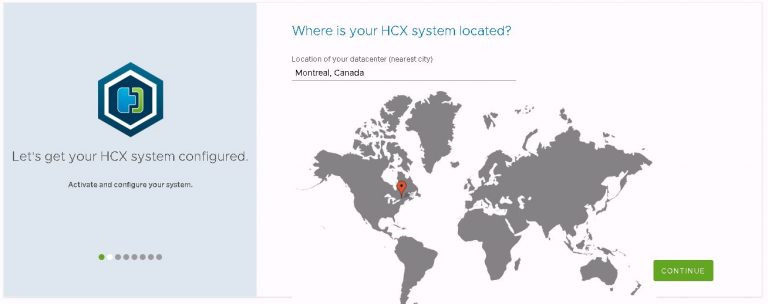
After the reboot, log back in at the same URL to continue the configuration. The next part involves picking a geographic location for your cluster. Feel free to be as imaginative as you like here. With all my clusters in the same physical location, I decided to take artistic license.
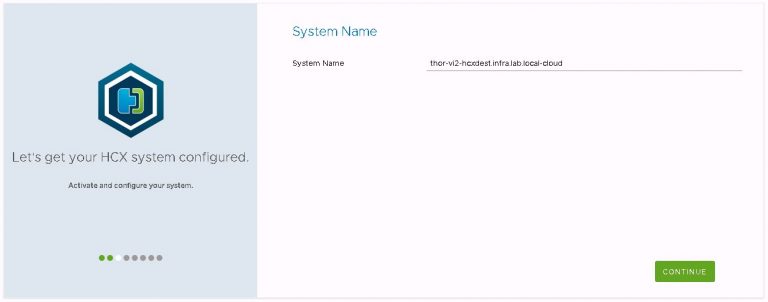
System name stays at the default, which is the FQDN with “cloud” tagged onto the end.
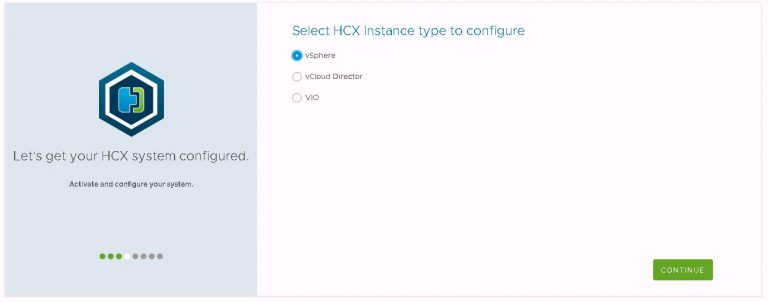
“vSphere” is the instance type I’m configuring. Interestingly, VIO support appears to have been added in the very recent past and is now included in the instance type list.
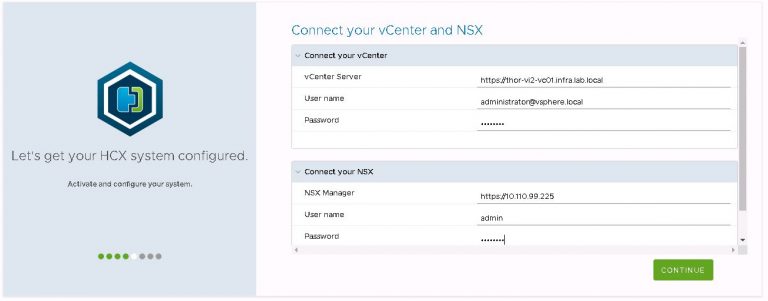
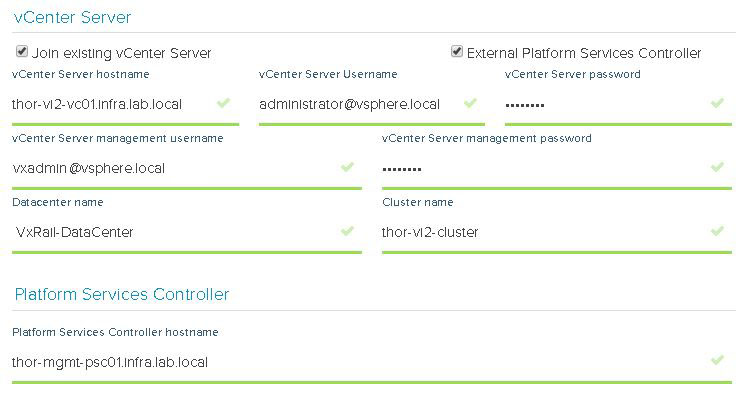
Next up is login details for my VI workload domain vCenter and NSX manager instances.
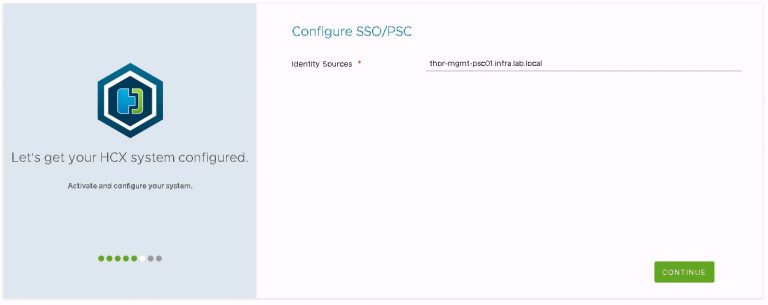
After which, the FQDN of the first PSC in the VCF management cluster.
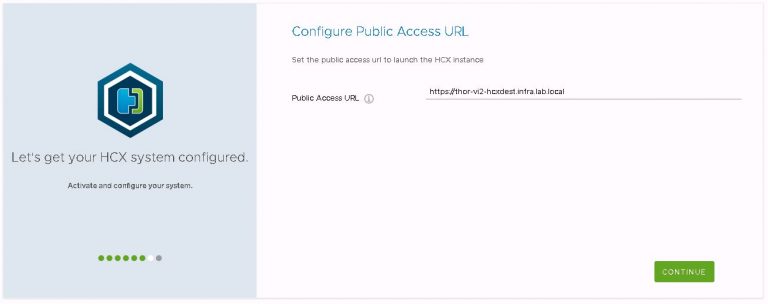
Then set the public access URL for the appliance/site. To avoid complications and potential for confusion down the road, this is set to the FQDN of the appliance.
Finally is the now ubiquitous review dialog. Make sure all the settings are correct, then restart for the config to be made active.
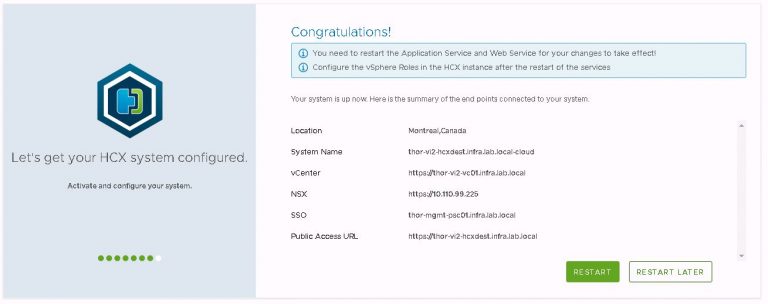
After the restart completes, additional vSphere roles can be mapped to HCX groups if necessary. The SSO administrators group is added as HCX system administrator by default, and that’s good enough for what I’m doing. This option is located within the configuration tab at the top of the screen. Then under vSphere role mapping from the left side menu.
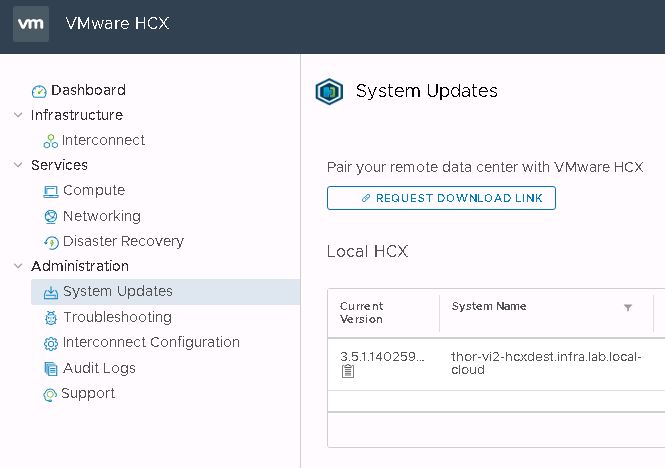
Deploying the OVA on the destination gives you what HCX call a “Cloud” appliance. The other side of the HCX partnership is the “Enterprise” appliance. This is what I’m deploying on the VxRack SDDC VI workload domain. This is another potential source of confusion for those new to HCX. The enterprise OVA is sourced from within the cloud appliance UI. You click a button to generate a link, from which you download the OVA. To find this button, log out of the HCX manager, then drop the :9443 from the URL and log back in using SSO administrator credentials. Go to the system updates menu and click “Request Download Link”.
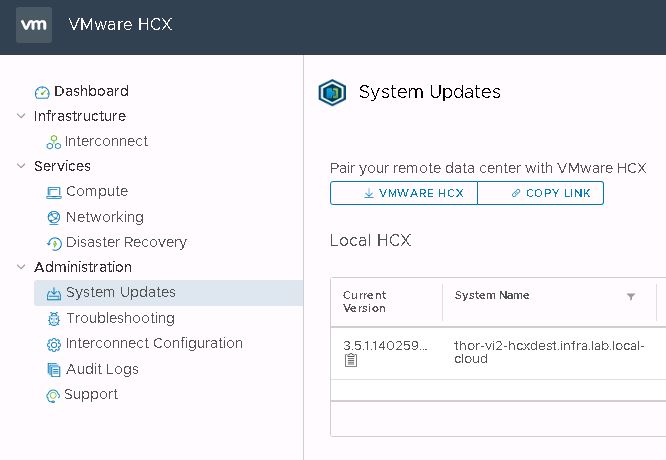
It may take a few seconds to generate the link, but the button will change to either allow you to copy the link or download the enterprise OVA directly.
I didn’t do this the first time around, because of an acute aversion to RTFM. Instead, I installed cloud and enterprise appliances that were of slightly different builds and ultimately, they did not cooperate. The site link came up just fine, I just wound up with VMs that would only migrate in one direction and lots of weird error messages referencing JSON issues.
The freshly downloaded enterprise appliance OVA gets deployed on the VxRack, and goes through much the same activation and initial configuration process as the cloud appliance did.
HCX had two methods of pairing sites. In fact, it has two. The regular “Interconnect” method and the new “Multi-Site Service Mesh”. The second is more complicated to set up, but the first is deprecated. So I guess the choice has been made for me.
Before I get to linking sites however, I need to create some profiles. This happens on both the cloud and the enterprise sites in an identical manner. I’ll create one compute profile per site, each containing three network profiles. The compute profile collects information on vSphere constructs such as datacenter, cluster and vSAN datastore. The network profiles are for my management, uplink and vMotion networks.
Still within the HCX UI, I move over to the interconnect menu under the infrastructure heading. The first prompt I get is to create a compute profile. I’ll try to make this less screenshot heavy than the above section.
1. First, give the compute profile a name. Something descriptive so it won’t end up needle in a haystack of other compute profiles or service names. I name mine after the vSphere cluster it’s serving.
2. In services, I deselect a couple of options because I know I’m not going to use them. Those are network extension service and disaster recovery service. All others relate to migration services I’m going to need.
3. On the service resources screen, my VI workload domain data center and vSphere cluster are selected by default.
4. All I need to select on the deployment resources screen is the vSAN datastore relevant for this cluster. Only the resources within this cluster are displayed.
5. Now I get to the first of my network profiles, so back to the screenshots.
In the drop down menu for management network profile, click create network profile.
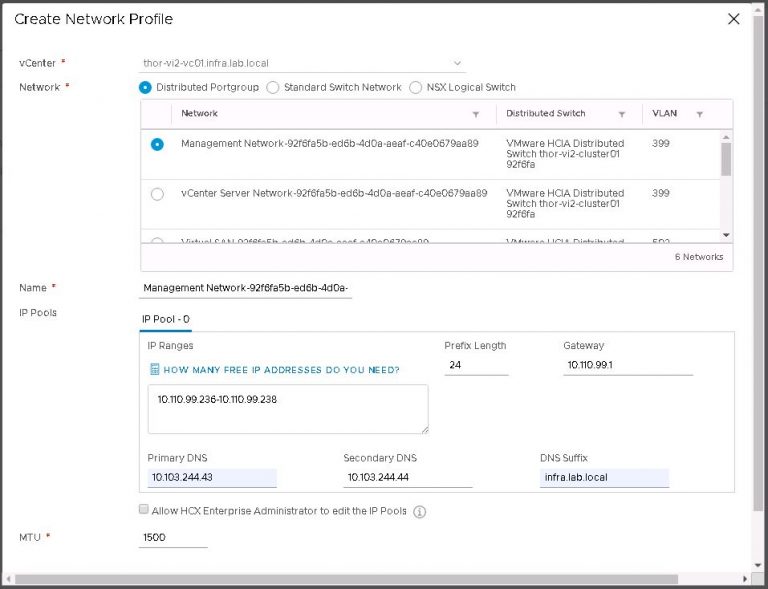
Each network profile contains an IP pool, the size of which will vary depending on the quantity and complexity of services you want to set up. In my case, not very many or very complicated; each IP pool got just 2 addresses.
But wait a second, my uplink network profile is probably a little misleading. As I’m reusing the same IP subnet for the new environment, I created a management network profile with a sufficiently large IP pool to also serve as the uplink profile. So really, my management network profile got 4 IP addresses. I lied. Sorry about that.
The uplink profile might be a separate VLAN with an entirely different IP subnet to act as a transit network between the VxRack and VxRail. In my case, they’re on the same physical switches so that seems a little redundant. If my source and destination were in two different physical locations, my uplink port group would be using public IP addressing within my organization’s WAN. On that subject, there are ports that need to be open for this to work, but it’s nothing too out of the ordinary. TCP 443 and UDP 500 & 4500. Not a concern for me, as I have no firewalling in place between source and destination.
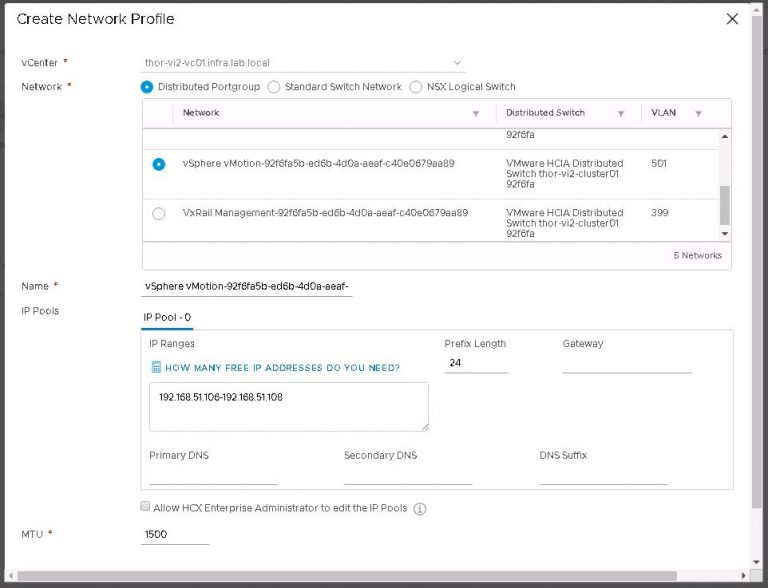
Finally I’ll create a vMotion network profile using the same process as the management network profile. I don’t have a default gateway on the vMotion VLAN, so I left that blank along with DNS information.
Next up is vSphere replication, and the management network profile is selected by default. Connection rules are generated, which is of concern if firewalls exist between source and destination. Otherwise, continue and then click finish to complete the compute profile on the destination.
Now do the exact same thing on the source appliance.
With all the profiles in place, I’ll move on to setting up the link. That is accomplished on the source appliance (or HCX plugin within vSphere web client) by entering the public access URL which was setup during the deployment of the cloud appliance, along with an SSO user that has been granted a sufficiently elevated role on the HCX appliance. Keeping things simple, I left it with the default administrator account. I’ll complete everything below from within the HCX source appliance UI.
First up, I’ll import the destination SSL certificate into the source appliance. If I don’t do this now, I’ll get an error when trying to link the sites in the next step. This is done by logging into the source appliance at https://[SOURCE-FQDN]:9443, clicking on the administration menu and then the trusted CA certificate menu. Click import and enter the FQDN of the destination appliance.
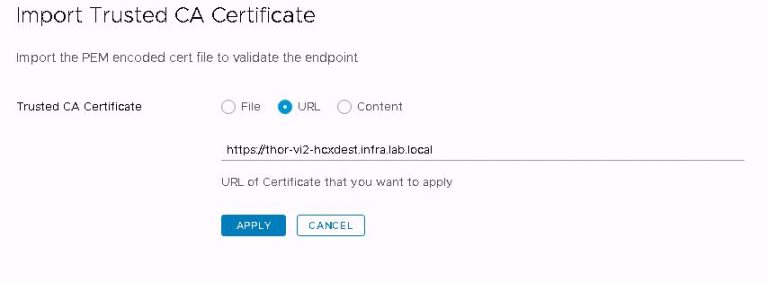
After clicking apply, I get a success message and the certificate is listed. With source and destination clusters sharing the same SSL root, the amount of setup I need to do with certificates is minimal. If I was migrating VMs across different trusted roots, I’d need a lot more to get it working. I’m not covering it here, mostly because I couldn’t explain it any better than Ken has already done on his blog.
Within the interconnect menu, open site pairing and click on the “Add a Site Pairing” button. Enter the public access URL of the destination site (remember I set it as the FQDN of the destination) and also enter a username and password for an SSO administrator account.
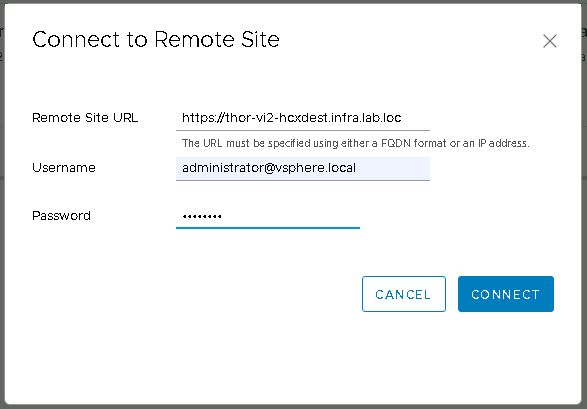
If everything up to this point has been configured correctly, the site pairing will be created and then displayed.

On the home stretch now, so I’m moving on to the service mesh. Within the service mesh menu, click on “Create Service Mesh”. The source appliance will be selected, click the drop down next to this to select the destination appliance. Now select compute profiles on both sites. Services to be enabled are shown. As expected, I’m missing the two I deselected during the compute profile creation. I could at this point choose entirely different network profiles if I wished. I don’t want to override the profiles created during the compute profile creation, so I don’t select anything here. The bandwidth limit for WAN optimization stays at it’s default 10Gbit/s. Finally a topology review and I’m done with service mesh. Except not quite yet. I’ll give it a name, then click finish.
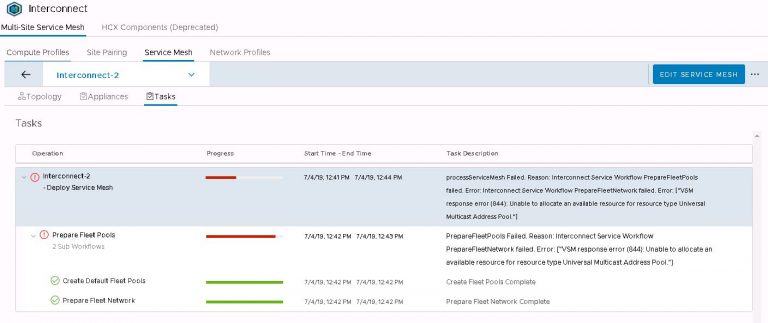
The service mesh will be displayed and I’ll open up the tasks view to watch the deployment progress. But alas, it fails after a couple of minutes. Thankfully, the error message doesn’t mess around and points to the exact problem. I don’t have a multicast address pool set up on my new NSX manager.
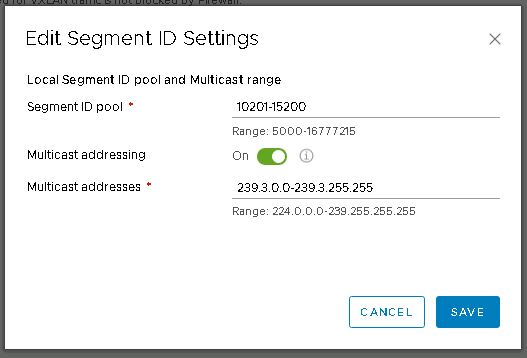
That’s an easy one to fix. In vSphere web client, jump over to the NSX dashboard by selecting networking and security from the menu. Then into installation and upgrade and finally logical network settings. Click on edit under segment IDs. Enable multicast addressing and give it a pool of addresses that doesn’t overlap with any other pool configured on any other instance of NSX that may be installed on VxRail or VxRack clusters.
With that minor issue resolved, I go back to the HCX UI and edit the failed service mesh. Step through the dialog again (not changing anything) and hit finish. Now I’m back to watching the tasks view. This time it’s entirely more successful.
The above configuration deploys two VMs per site to the cluster and vSAN datastore chosen in the compute profile. A single, standalone ‘host’ (like a host, but more virtual) is added per site to facilitate the tunnel between sites.
Leaving the newly deployed service mesh to settle and do it’s thing for a few minutes, I returned to see that the services I chose to deploy are all showing up. Viewing the interconnect appliance status shows that the tunnel between the sites is up.

In the vSphere web client, it’s time to test that tunnel and see if I can do some migrations. The HCX plugin is available in the menu, and the dashboard shows our site pairing and other useful info.
Into the migration menu and click on “Migrate Virtual Machines”. Because I don’t really want to have to migrate them one by one. I could have done that by right clicking on each VM and making use of the “HCX Actions” menu. That was labeled “Hybridity Actions” when I was running an earlier version. I imagine that was like nails on a chalkboard to the UX people.
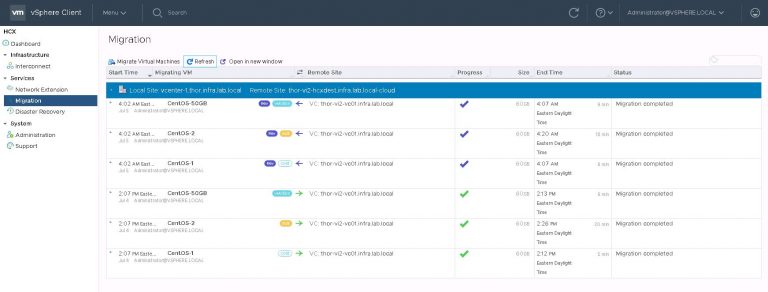
Inside the migrate virtual machines dialog, my remote site is already selected. If I had more than one (when I have more than one), I’ll need to select it before I can go any further. I’m going to migrate three test VMs from the VxRack SDDC to the VxRail VI workload domain, using each of the three available migration options. Those are vMotion, bulk and cold.
The majority of my destination settings are the same, so I set default options which will be applied to VMs chosen from the list. The only things I’ll need to select when picking individual VMs is the destination network and either bulk or vMotion migration.
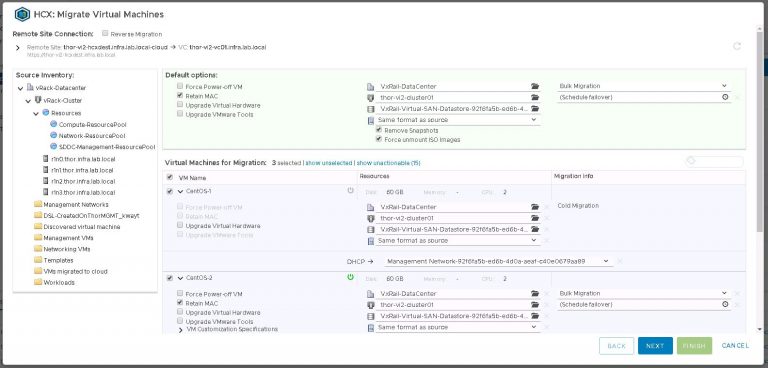
A little info on migration options. When I select a powered off VM, cold migration is the only available option. For powered on VMs, I can choose bulk or vMotion. The difference being that vMotion (much like a local vMotion) will move the VM immediately with little to no downtime. Bulk migration has the added benefit of being able to select a maintenance window. That being, a time when the VM will be cut over to the destination site. Very useful for, as the name suggests, migrating VMs in bulk.
With all my options set, I advance to the validation screen. Unsurprisingly, its telling me that my vMotion might get affected because of other migrations happening at the same time. My bulk migration might need to reboot the VM because my installation of VMware tools is out of date. As this is a test, I’m not going to worry about it.
As you’d expect, vMotion requires CPU compatibility between clusters. Not an issue for me, because I’m reusing the same hosts so all of the nodes have Intel Xeon 2600’s. If this wasn’t the case, I’d have ended up enabling EVC. But better to figure out any incompatibility up front because enabling EVC once you’ve got VMs already on the cluster isn’t a trivial matter. Also on this subject, be aware that when a VxRail cluster is built, EVC will be on by default. I already turned it off within my destination VxRail cluster.
I’m going to go out on a limb and guess that bulk migration is the one I’ll end up using the most. That way, I can schedule multiple VMs during the day and set my maintenance window at the same time. Data will be replicated there and then, with VM cutover only happening later on in the maintenance window. Great for those VMs that I can take a small amount of downtime on, knowing it’ll be back up on the VxRail in the time it takes to reboot the VM.
Second will probably be cold migration, for those VMs that I care so little about that I’ve already powered them off on the VxRack. Any high maintenance VMs will get the vMotion treatment, but still certainly within a brief maintenance window. HCX may whine at me for VMware tools being out of date on (some) most of the VMs, so I’ll either upgrade tools or deal with HCX potentially needing to bulk migrate and reboot those VMs in order to move them.
As to why I left two services out of the service mesh, I won’t be using HCX in a disaster recovery scenario and I won’t be extending any layer 2 networks. The VxRack and VxRail share top of rack switching, so any and all important L2 networks will be trunked to the VxRail and have port groups created.
That’s certainly leading on to a much larger conversation about networking and VLAN or VXLAN use. Both the VxRack SDDC and VCF on VxRail clusters have NSX installed by default, and I’m using NSX backed networks for some of my VMs. I’ll get to that in the near future as a kind of addendum to this process.
So;
How long is it going to take? – I was just a little under 2 days total before I touched HCX. A single source and destination install, along with configuration and site pairing could make up the rest of day 2. All that takes about 90 minutes.
And;
How much of it can be automated? – Depending on your chosen deployment strategy, HCX could be a one-time install. Given the relatively short time it takes to install (plus the potential for errors as we’ve seen above) makes it a hard sell for automation.
With HCX installed and running, I can move onward. Out of the frying pan and into the fire. Getting some of those production VMs moving.




 Next up is NSX settings. Very self-explanatory, nothing out of the ordinary here. I entered my VXLAN VLAN ID and some IP settings for both the NSX manager and controller cluster.


 I monitored the progress in the SDDC manager tasks view. It took about 40 minutes to run the cluster addition tasks and display my new VI workload domain in SDDC manager.


