
Quick Links
Part 1: Building the VCF on VxRail management cluster
Part 2: Virtual Infrastructure Workload Domain creation
Part 3: Deploy, Configure and Test VMware HCX
Part 4: Expanding Workload Domains
At the end of part 3, I said
With HCX installed and running, I can move onward. Out of the frying pan and into the fire. Getting some of those production VMs moving.
Except we won’t be doing that, because in a lab scenario, it’d be boring. There isn’t really any interdependency between VMs in my lab. There are no multi-tiered apps running, no network micro-segmentation or any one of the other countless gotchas you have to plan around for a production environment. I’d end up writing a long, detailed post about moving some test VMs between VxRack and VxRail clusters. I’d be rehashing a lot of what I wrote in the previous post regarding VMware HCX migration types and varied migration strategies.
So instead, straight onto expanding workload domains.
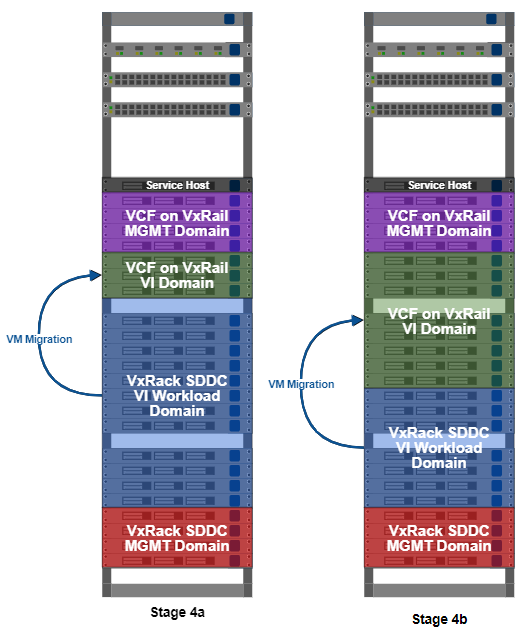
After using HCX to migrate some of the initial workload to the VCF on VxRail VI workload domain, the three node cluster is naturally going to get a little resource constrained. At the same time, resources are going to be freed up on the VxRack SDDC nodes. So using the process I detailed in part 1 to build the management and VI workload domain clusters, I’ll convert some more VxRack SDDC nodes into VxRail nodes and expand my VI workload domain.
To briefly recap the conversion process;
- Decommission the VxRack SDDC node in SDDC manager.
- Power the node down and install hardware (if necessary).
- Complete all required firmware updates.
- Mount VxRail RASR ISO image and factory reset the node.
With the above completed, I’ve got a brand new VxRail node ready to go. Within vCenter, right click on the cluster name and from the VxRail menu, select Add VxRail Hosts. It may take a few seconds for the new node details to populate. Once the node(s) appear in the list, I can continue by clicking the Add button.
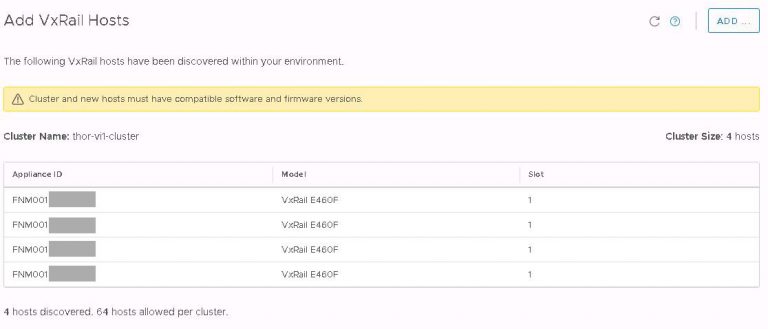
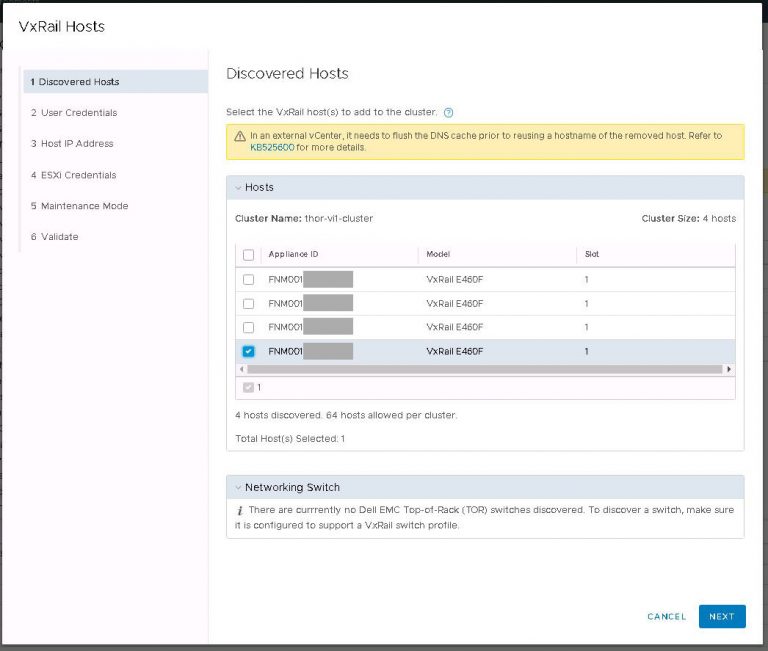
In this case, I’m only going to add one of the four discovered nodes to the cluster.
Provide credentials of an administrative user.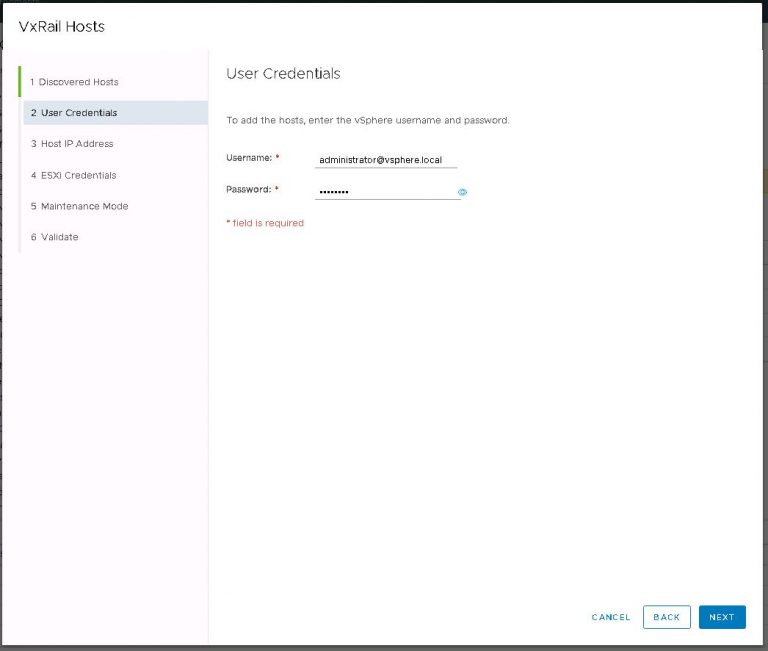
Then verify that a sufficient number of IP addresses in the management, vMotion and vSAN IP pools are free. If not, create additional pools. 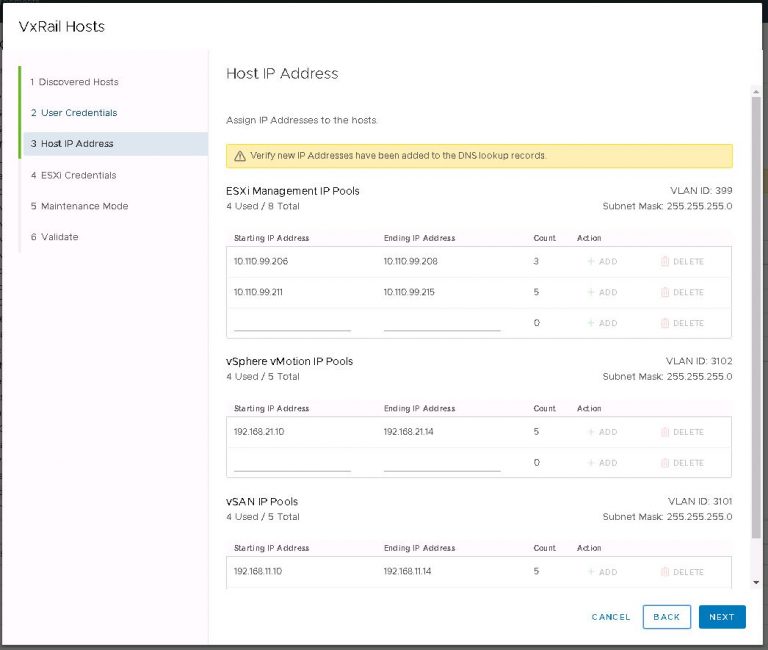
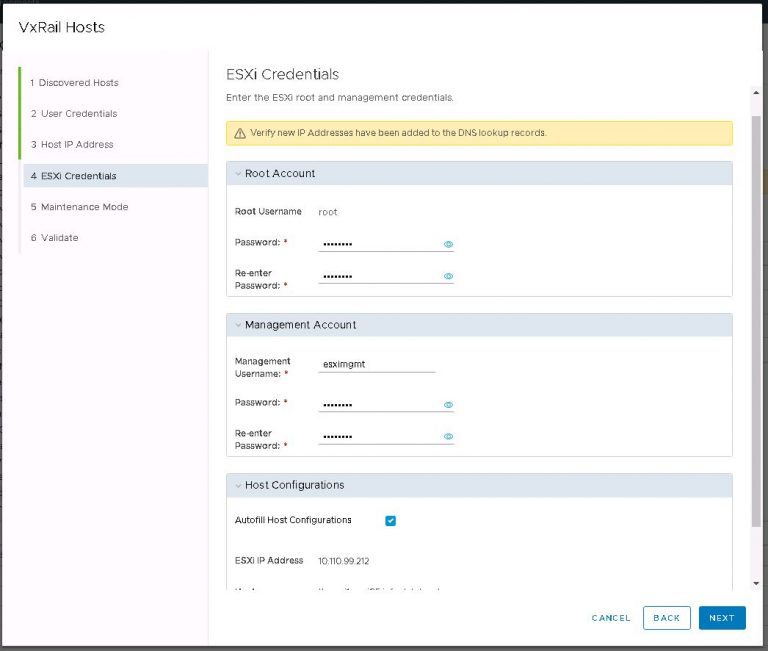
Provide more credentials
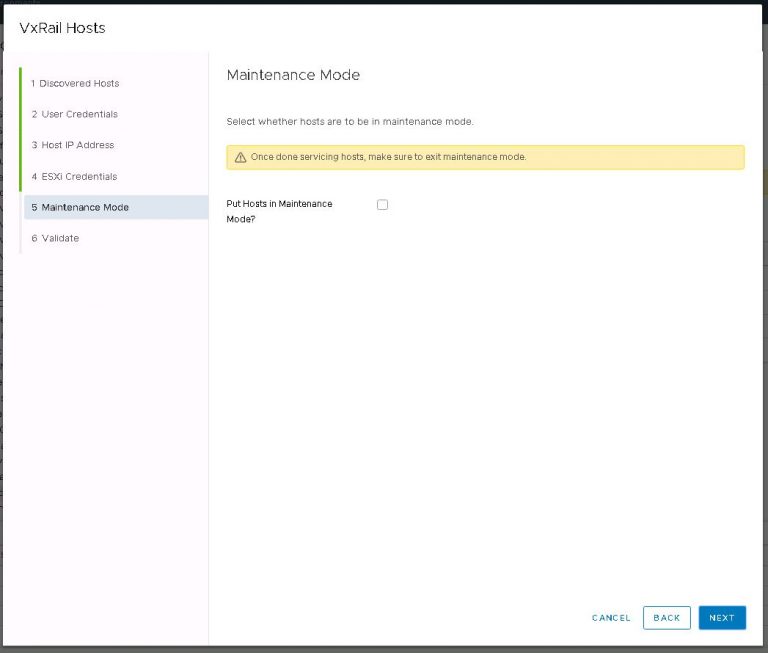
Finally confirm if the new node(s) will remain in maintenance mode once addition is complete.
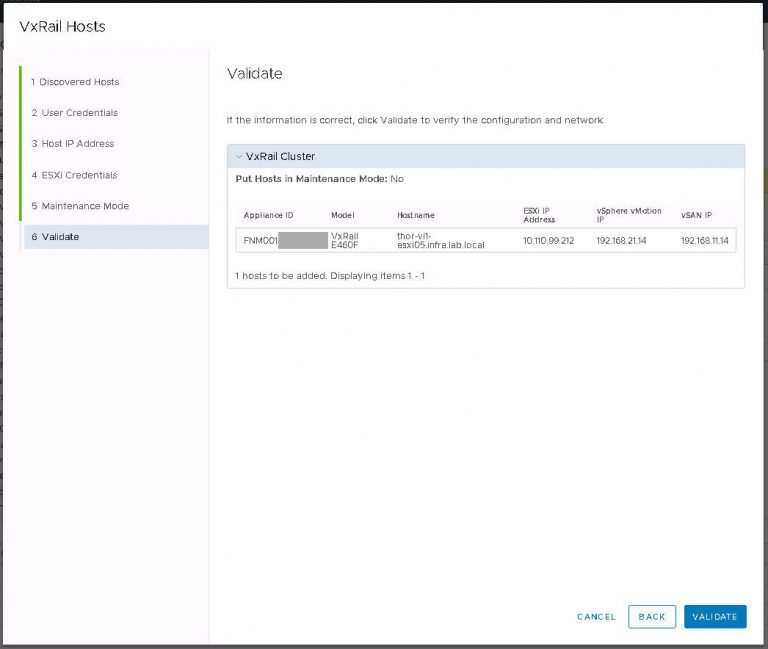
Everything looks good, click validate. Once the validation process finishes successfully, I can proceed with the node addition.
Within a few minutes, the new node will be added to the cluster in vCenter. The only problem now is that SDDC manager knows nothing about it. So I’ll fix that. A moderate amount of digging through menus is required. Within SDDC manager, select Inventory > Workload Domains. I picked the workload domain I want to add the node to, in this case ‘thor-vi1-cluster’. Click the Clusters tab to display the VxRail clusters within this workload domain. I don’t believe I’ve covered it yet, but yes, a single workload domain can contain one or more VxRail clusters. Click the cluster to which the node will be added. As you can see in the screenshot below, the actions menu contains a link to add the new node.
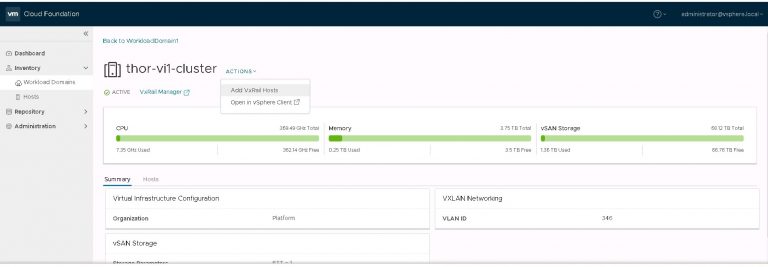
All going well (and assuming my new node is setup correctly), it’ll appear in the next dialog (below) after a brief period of discovery.

It did, so no loudmouth troubleshooting is required. Incidentally, as all my top of rack multicast configuration has been carried out on a specific VLAN, I need to do a little modification to new nodes so they’ll see and contribute to the multicast group properly. Otherwise, VxRail manager isn’t going to discover anything. This is slightly different in VxRail 4.7 code, which introduces two new portgroups. Long story short, when I’m bringing up a new node, I change the VLAN assignment for “Private Management Network” to my custom VLAN. The CLI commands are basic, but I’ll include them below for the sake of completeness.
“esxcli network vswitch standard portgroup list” – to check the VLAN assignments for the portgroups.
“esxcli network vswitch standard portgroup set -p “Private Management Network” -v [VLAN]” – to set the VLAN on which multicast is running.
In the spirit of not over complicating it, I always use the ESXi management VLAN as my private management network VLAN. But if you wanted to segregate multicast traffic to its own VLAN, the option is there.
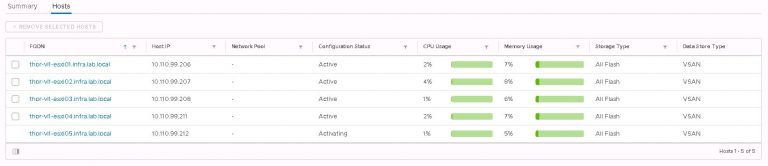
Nothing terribly exciting happens after the above dialog I’m afraid. All there is left to do is watch the status pane in SDDC manager as the new node switches from activating to active. After that happens, the new node is ready to go.
The above is an example of converting and adding a single new node into an existing VxRail cluster & SDDC workload domain. It’s not difficult to imagine that if you were to convert nodes one by one on a large VxRack SDDC system, it would be a job for life. When the migration from VxRack to VxRail is in progress, it makes sense to include as many nodes as possible in each iteration of convert & expand. I can convert several concurrently as easily as converting one, with little additional time penalty. When the time comes to add those converted nodes into a VxRail cluster, it can be a bulk operation.
Needless to say, it should be extensively planned, depending on factors in your environment. If I migrate X amount of VM load from VxRack SDDC cluster Y, then in turn I can remove X number of nodes from VxRack SDDC Cluster Y and immediately make that compute & vSAN storage capacity available on VxRail Cluster Y. That, of course, is a gross oversimplification. What I’m really getting at is, if you’ve got the capacity, don’t do it one by one or you’ll go nuts long before you’ve got your several hundred node VxRack SDDC to VCF on VxRail migration completed.
As you might expect, the above is a ‘rinse & repeat’ process until all the production load is migrated successfully from VxRack to VxRail. Either continue to add capacity to existing VxRail clusters/workload domains, or create new additional workload domains using the process covered in part two of this series.
As for the questions I’ve been answering throughout this series;
How long is it going to take? – About four hours to convert a node if you insist on doing it the painful (one by one) way. That is everything from the initial decommission out of VxRack SDDC manager, hardware changes (if required), creating the RASR partition, installing the VxRail code and waiting for the ESXi configuration. Adding nodes to VxRail clusters and VCF workload domains is pretty trivial. Let’s add another 15 minutes or so for that. As above, many nodes at once make lighter work. Lighter still if you automate the process.
How much of it can be automated? – So, so much. Almost the entire conversion process is a candidate for automation. In an ideal scenario, I’d let automation take the reins after I’ve confirmed that the node(s) are successfully decommissioned from VxRack SDDC and I’ve completed any necessary hardware changes. I probably wouldn’t automate the addition of those newly converted nodes to VxRail clusters, but maybe that’s just me.
Next up, I’m going to be doing something short and sweet. I’ll be destroying the VxRack SDDC management workload domain and reclaiming the resources therein.